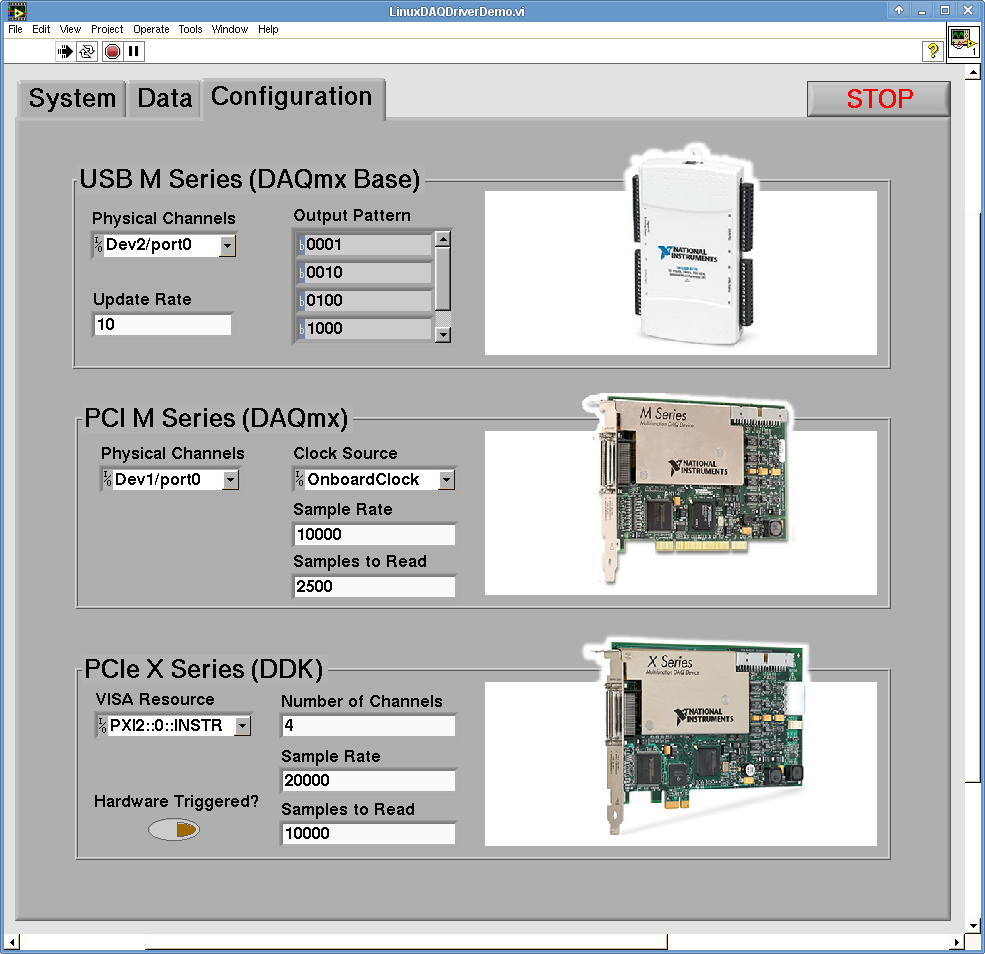
These LabVIEW 2012 examples were created for the Linux Users Forum during NIWeek 2012 to demonstrate how to use NI DAQ hardware on Linux.
| Linux DAQ Driver Demo | X Series DDK LabVIEW Demo | 
|---|
  |   | 
| Description | Description | 
Uses three families of DAQ hardware: - PCIe X Series (NI 63xx)
 - PCI M Series (NI 62xx)
 - USB M Series (NI 621x)
 
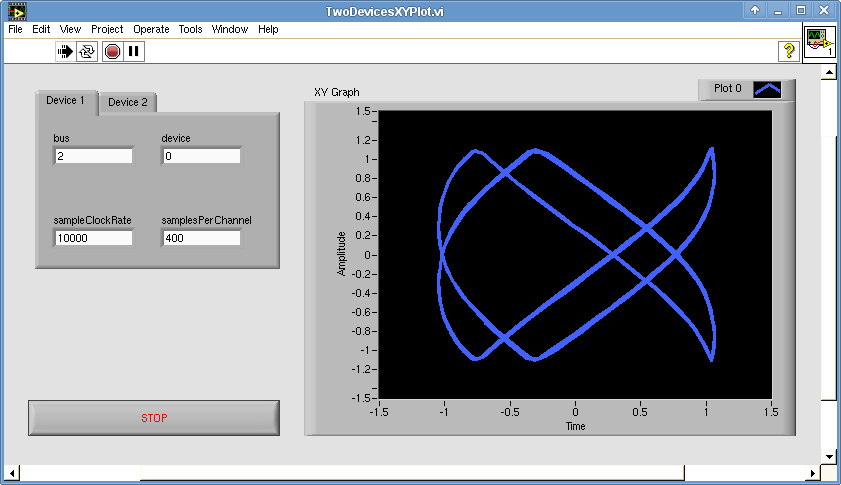
  | Uses one or two X Series devices to acquire analog data. | 
| Drivers | Drivers | 
- NI-MHDDK 2.0 for PCIe X Series support
 - NI-DAQmx 8.0.2 for PCI M Series support
 - NI-DAQmx Base 3.6 for USB M Series support
 
  | - NI-MHDDK 2.0 for PCIe X Series support
 
  | 
| Setting up the demo | Setting up the demo | 
- Install LabVIEW (see its readme)
 - Install the DAQ drivers
- NI-DAQmx 8.0.2 first (see its readme)
- Manually add support for LabVIEW 2012 by selecting to install LabVIEW 8.6 support (under the default path) and by following these instructions.
 
  - NI-DAQmx Base 3.6 second (see its readme)
 
  - Build the X Series DDK shared library using the NI-VISA OS interface component (see below)
 
  | - Install LabVIEW (see its readme)
 - Build the X Series DDK shared library using any Linux OS interface component (see below)
 
  | 
| Running the demo | Running the demo | 
- Open "LinuxDAQDriverDemo.vi".
 - Connect the devices together using the diagram on the "System" tab.
 - Connect a 10 kHz 0 - 5 V square wave to PFI0 of the PCI M Series device.
 - Under the "Configuration" tab, specify your devices names.
- Use the "lsdaq" command to identify your USB M Series device.
 - Use the dropdown box or the "nilsdev" command to identify your PCI M Series device.
 - Use the dropdown box or the "NIvisaic" command to identify your PCIe X Series device.
 
  - Switch to the "Data" tab.
 - Run the VI.
 
  | - Open "NIXSeriesLabVIEW.lvproj".
 - Connect an input signal to ai0 of your X Series device(s).
 - If you have one X Series device, open "OneDevice.vi".
 - If you have two X Series devices, open "TwoDevicesXYPlot.vi".
 - Specify your device(s) bus and device numbers.
- If you're using the NI-VISA OS interface component, use the "NIvisaic" command to determine them.
 - If you're using the Linux kernel OS interface component, use the "lsdaq" command to determine them.
 
  - Run the VI.
 
  | 
| Downloads | Downloads | 
 |  | 
Building the X Series DDK as a Shared Library
  | 
|---|
- Update the make rules and targets to build a shared library.
- OS Interface makefile (eg linux-visa.mak)
- Define "DLL_SUFFIX := .so" after "PRG_SUFFIX".
 - Add "--export-dynamic -shared" to "LDFLAGS".
 - Replace "$(PRG_SUFFIX)" with "$(DLL_SUFFIX)".
 
  - Makefile
- Set "OSINTERFACE_MAKEFILE" to your OS interface component.
 - Update "USE_64_BIT" to match your kernel's bitness.
 - Remove "$(BUILD_DIR)/main$(OBJ_SUFFIX)" from the "OBJECTS" list.
 - Replace all of the targets listed under "TARGETS" with "$(BUILD_DIR)/main$(DLL_SUFFIX)".
 - Replace the "ifneq" block with "include $(DMA_LIBRARY_DIR)/dma.mak".
 
  - Update main.cpp to expose aiex3 as a shared library.
- Place the patch file (attached) in the same folder as the "nixseries" folder and apply it by typing:
 
  - $ patch nixseries/Examples/main.cpp < makeSharedLibary.patch


  - Build the shared object by typing:
 - If using NI-VISA, allow NI-VISA to associate with X Series devices by following the Linux directions in "nimhddk_visa.inf".
 - If using the Linux kernel module, insert the nirlpk.ko module into the kernel (see its readme).
 - Install the new shared library by typing as root:
- # cp main.so /usr/local/lib/libnixseriesddk.so
 - # ldconfig


  | 


	Joe Friedchicken| NI Configuration Based Software | 
|---|
Get with your fellow OS users [ Linux ] [ macOS ] | Principal Software Engineer :: Configuration Based Software Senior Software Engineer :: Multifunction Instruments Applications Group (until May 2018) Software Engineer :: Measurements RLP Group (until Mar 2014) Applications Engineer :: High Speed Product Group (until Sep 2008) |