Turn on suggestions
Auto-suggest helps you quickly narrow down your search results by suggesting possible matches as you type.
Showing results for
Document Options
- Document History
- Subscribe to RSS Feed
- Mark as New
- Mark as Read
- Bookmark
- Subscribe
- Printer Friendly Page
- Report to a Moderator
Document options
- Subscribe to RSS Feed
- Mark as New
- Mark as Read
- Bookmark
- Subscribe
- Printer Friendly Page
- Report to a Moderator
Building a Steering Wheel Controller Using the NI myDAQ
Materials
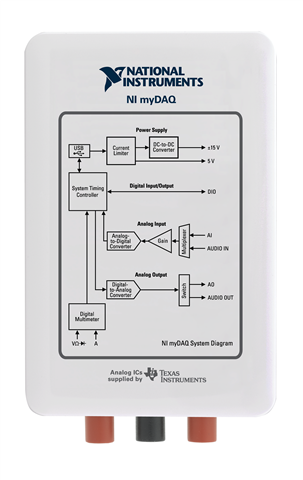
- NI-MyDAQ device

- LabVIEW 2009 software and DAQmx driver
· Accelerometer - any 2 or 3 axis will work, MMA7260QT 3-Axis Accelerometer recommended ($14.99+ ~$5 S/H)
· Wire – 6 wires are needed, 8 for the optional button. 1 CAT5 ethernet cable recommended (about $5 including S/H from amazon: http://www.amazon.com/gp/product/B0018EJ6Z2?ie=UTF8&seller=A1DG59V7X4UWX7&sn=cablemart)

· Wheel housing - anything from a cardboard circle to a Nintendo Wii steering wheel accessory (about $5 including S/H from amazon: http://www.amazon.com/STEERING-RACING-NINTENDO-REMOTE-CONTROLLER/dp/B001MW3TU8)
· Duct tape
· (Optional) button for additional interaction in game – ($2 at radio shack)

Instructions:
1. If using an Ethernet cable, cut the 2 ends off to reveal 4 colored pairs of wire. Use scissors or a knife to cut back the outer insulation
2. Strip 6 of the wires so about half an inch of wire is revealed (or all 8 if using the optional button). On the other end, strip about an inch for easier wiring to the sensors.
3. Attach the wires to the accelerometer and pushbutton as shown below. You may need to cut some of the copper wires from each lead to fit in the holes of the accelerometer (see figures 1-3)
Figure 1. Wiring Diagram

Figure 2. Photo of accelerometer wiring

Figure 3. myDAQ wiring
4. Mount the accelerometer and the optional button to the wheel.
5. Install the DAQmx driver and LabVIEW on your computer
6. Run the SteeringWheelController VI, then click the run button. Follow the on screen dialogs to calibrate the wheel.

Figure 4. Front Panel of controller VI
7. Once finished calibrating, the Turn Intensity and Throttle Indicators will match the orientation of the steering wheel
8. Run your desired game, and map the controls to the wheel (left is num4, right is num6, throttle is num8, and the optional button is “p”)
ATTACHED: VI CODE
Comments
Options
- Mark as Read
- Mark as New
- Bookmark
- Permalink
- Report to a Moderator
06-10-2011
07:57 PM
nice example, can u pls tell me or give a link where did u find the game and how did u set the controls?
Options
- Mark as Read
- Mark as New
- Bookmark
- Permalink
- Report to a Moderator
04-19-2017
01:27 PM
The vi file for steering wheel control is not on the list of files! would you mind uploading the vi again ?


